
Introduction
A laminate floor can look simple to install, but small setup mistakes can show up after the last plank clicks into place. Laminate flooring installation uses interlocking planks over a prepared subfloor, often with an approved underlayment or attached pad.
Walls & Builds helps homeowners approach laminate flooring projects with careful preparation, a planned layout, and attention to the product’s required expansion space. Good results start with matching the installation method to the flooring, room, and surface below.
What Is Laminate Flooring Installation?
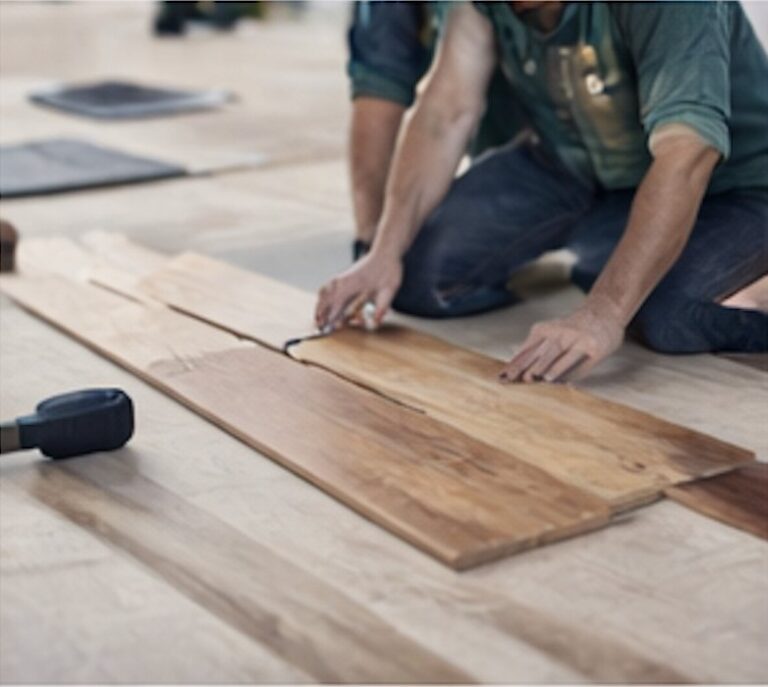
Laminate flooring installation usually involves connecting click-lock planks to form a floating floor over a prepared subfloor. The planks connect to one another instead of being fastened directly to the floor below, while underlayment requirements depend on the specific product.
Homeowners comparing laminate with other materials can also review different flooring options and installation methods before choosing a floor.
Is Laminate Flooring Easy to Install Yourself?
Do-it-yourself (DIY) laminate installation can work well in a small rectangular room with a flat subfloor and few obstacles. The job becomes harder when a space has uneven areas, several doorways, stairs, angled walls, connected rooms, or detailed cuts around cabinets and fixtures.
Accurate measuring matters because click-lock joints can be damaged if you force planks into place.
What Laminate Flooring Installation Tools Do You Need?
Common laminate flooring installation tools include measuring, cutting, fitting, and safety equipment. The exact tool list can change with the flooring system, but most projects require:
- Tape measure, pencil, and square for marking cuts
- Spacers for maintaining the required perimeter gap
- Tapping block and pull bar for fitting planks
- Rubber mallet for controlled tapping
- Jigsaw or another suitable saw for cuts and notches
- Level or long straightedge for checking the subfloor
- Eye, hearing, knee, and dust protection as needed
An oscillating multi-tool can also help undercut door casings so planks fit below the casing instead of leaving a wide cut around it.
What Should You Do Before Installing Laminate Flooring?
Before installation begins, read the product instructions and inspect the surface below the new floor. Subfloor condition, underlayment requirements, and acclimation instructions can affect how the finished floor fits and moves.
Good preparation also helps uncover repairs before new material covers the problem.
How Do You Prepare the Subfloor?
Prepare the subfloor so it is clean, stable, dry, and flat enough for the chosen laminate product. Remove debris and old adhesive, secure loose areas, repair damaged sections, and correct high or low spots that exceed the flooring manufacturer’s tolerance.
Concrete and other moisture-prone surfaces may also require moisture testing or protection based on the product instructions.
Does Laminate Flooring Need Underlayment?
Whether you need separate underlayment depends on the laminate product and the subfloor below it. Some planks already have an attached pad, while other products require a compatible underlayment before installation.
Concrete installations may also need an approved moisture barrier or underlayment system. Adding an extra layer without checking the instructions can make a floating floor too soft for the locking system.
Does Laminate Flooring Need to Acclimate?
Acclimation requirements depend on the flooring manufacturer and product. Some laminate products need time in the installation area before work begins, while the exact conditions and duration come from the manufacturer’s instructions.
Keep the flooring stored as directed until the product is ready to install.
How Do You Install Laminate Flooring Step by Step?
Laminate installation moves from measuring and surface preparation to plank fitting and finish work. Each stage affects the next, so problems in the first rows or subfloor can become harder to correct later.
For larger renovations, it also helps to plan the order of flooring and other remodeling work before materials arrive.
Step 1: Measure the Room and Plan the Layout
Measure the room and decide how the plank rows will run. Plan the first and last rows before cutting so narrow pieces or awkward joints don’t show up at the opposite wall.
Step 2: Prepare the Subfloor
Clean and inspect the entire surface before laying planks. Repair damage and correct uneven areas according to the flooring product’s requirements.
Step 3: Install Underlayment if Required
Install the approved underlayment or moisture protection when the flooring system requires it. Follow the instructions for seams, tape, orientation, and coverage instead of adding extra layers.
Step 4: Lay the First Row
Start the first row according to the click-lock system and room layout. Keep the row aligned because a crooked starting line can affect every row that follows.
Step 5: Leave the Required Expansion Gap
Maintain the expansion space specified by the flooring manufacturer around walls and fixed objects. Spacers help keep that distance consistent during installation.
Step 6: Stagger and Connect the Planks
Offset end joints according to the product’s minimum joint-spacing requirements. Connect each plank using the approved locking method and avoid striking exposed edges directly.
Step 7: Cut Around Doors and Obstacles
Measure doorways, pipes, vents, and other obstacles before making each cut. Door casings can often be undercut so the flooring slides underneath for a cleaner finish.
Step 8: Install the Final Row
Measure the remaining space at several points because walls are not always perfectly parallel. Cut the final planks to fit while keeping the required perimeter space.
Step 9: Add Baseboards and Transitions
Remove temporary spacers and finish the perimeter with the planned baseboards or molding. Add suitable transition pieces where flooring changes between rooms or materials.
How Much Does Laminate Flooring Installation Cost?
Laminate flooring installation cost depends on project size, product selection, labor, and the condition of the existing floor. Square footage is only one part of the estimate because preparation and finish work can change the scope.
Old-floor removal, subfloor repair or leveling, required underlayment, baseboards, transitions, stairs, closets, and difficult room layouts can all affect cost. A written estimate should separate these items so homeowners can see what is included before work begins.
What Does Bad Laminate Flooring Installation Look Like?
Bad laminate flooring installation may show up as open joints, lifting, buckling, movement underfoot, uneven areas, damaged locking edges, or poorly fitted transitions. Cuts around walls and doorways may also look rough if the layout wasn’t planned carefully.
Those symptoms don’t always indicate an installation mistake. Moisture, a damaged subfloor, or movement below the finished floor can cause similar problems, so identify the cause before repairs begin.
What Are the Most Common Laminate Flooring Installation Mistakes?
Common laminate flooring installation mistakes usually involve surface preparation, plank spacing, or handling the click-lock joints. Problems often start before you install most of the floor.
Typical mistakes include:
- Installing over a dirty, damaged, or uneven subfloor
- Using an underlayment system that does not match the product
- Leaving too little required expansion space
- Staggering end joints outside the manufacturer’s requirements
- Forcing or striking click-lock joints
- Making poor cuts around doors, walls, or fixed objects
- Skipping product instructions for acclimation, moisture, or installation limits
Small preparation errors can become expensive once you connect several rooms.
Should You DIY Laminate Flooring or Hire a Professional?
DIY laminate installation makes the most sense in a small, simple room with a sound subfloor and few difficult cuts. Homeowners also need the right laminate flooring installation tools and enough time to measure, cut, and fit each row carefully.
Professional installation can be more practical for damaged or uneven subfloors, stairs, connected rooms, kitchens, difficult transitions, or larger projects. A remodeling contractor can also coordinate flooring with wall repairs that should be completed before finish work when several parts of the room are being updated.
How to Find Laminate Flooring Installation Near Me
A search for laminate flooring installation near me should focus on scope, preparation, and relevant flooring experience. Look for a written estimate that explains subfloor inspection, old-floor removal, disposal, laminate installation, transitions, trim, and cleanup.
Ask how unexpected subfloor damage will be handled if it appears after removal. Clear answers before work starts make it easier to compare estimates based on the actual scope instead of the lowest starting number.
Homeowners can also review residential flooring services and preparation options when planning the project.
Frequently Asked Questions About Laminate Flooring Installation
How much does laminate flooring installation cost?
Laminate flooring installation cost depends on square footage, material, labor, floor removal, subfloor repairs, underlayment, trim, transitions, and room complexity.
What tools do you need to install laminate flooring?
Common laminate flooring installation tools include a tape measure, square, spacers, a tapping block, a pull bar, a rubber mallet, a saw, a level, and appropriate safety equipment.
How can you tell if laminate flooring was installed badly?
Bad laminate flooring installation can cause gaps, buckling, movement, uneven areas, damaged joints, or poor transitions, although moisture and subfloor problems can create similar signs.
Can laminate flooring be installed over existing flooring?
Laminate can go over certain stable, dry, flat existing surfaces when the flooring manufacturer approves the substrate and the added floor height does not create problems.
How do I find a laminate flooring installer near me?
Look for laminate flooring installation near me providers that inspect the subfloor, give a written scope, explain removal and disposal, and include trim, transitions, and cleanup in the estimate.
Professional Laminate Flooring Installation in Los Angeles and Orange County
Walls & Builds provides residential laminate flooring installation for homeowners in Los Angeles and Orange County, including preparation, installation, transitions, and finish work. As a home remodeling contractor, the team can also coordinate flooring with broader residential remodeling projects or interior painting planned around the same room update.
Proper preparation and product-specific installation matter from the subfloor to the final transition, so request a laminate flooring installation estimate to review the space and project scope before work begins.